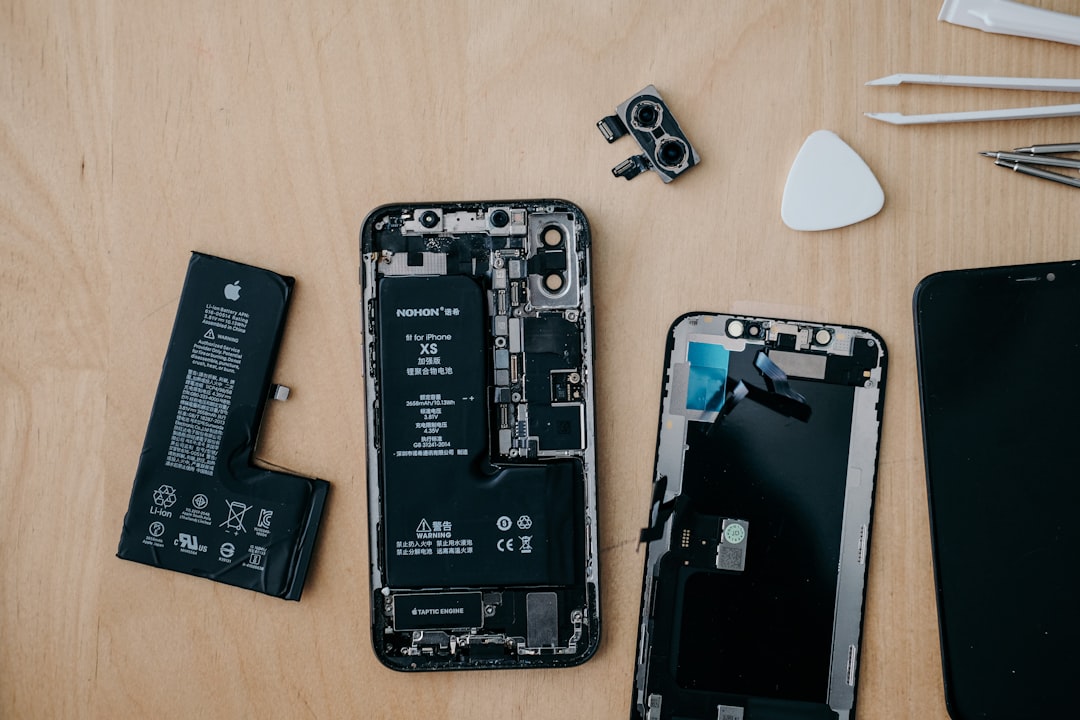
Modern households rely heavily on electronic devices, ranging from kitchen appliances and entertainment systems to smartphones and smart home hubs. When these gadgets fail, the default reaction is often replacement rather than restoration. However, implementing proper DIY repair instructions for home electronic devices offers substantial financial savings, reduces environmental electronic waste, and preserves functional hardware. Consumer electronics frequently encounter minor component failures, such as loose internal ribbons, degraded thermal paste, or faulty capacitors. Understanding how to systematically approach troubleshooting transforms complex gadget failures into manageable maintenance projects.
Essential Safety Protocols Before Disabling Gadgets
Safety remains the absolute priority when engaging in electronics restoration. Even small home devices store electrical charges in internal capacitors long after being unplugged from wall outlets. Before opening any hardware casing, technicians must disconnect all power sources and remove backup batteries. Utilizing antistatic wrist straps prevents electrostatic discharge (ESD) from damaging sensitive microchips and printed circuit boards (PCBs). Wearing safety glasses protects eyes from flying debris when cutting wires, snipping zip ties, or handling shattered glass screens on mobile devices. Working in a well-lit, dry environment with an insulated workbench minimizes accidental shorts and enhances precision during intricate reassembly procedures.
Building a Professional DIY Electronics Toolset
Successful hardware troubleshooting requires more than a standard kitchen screwdriver. Assembling a specialized toolkit ensures precision handling without stripping delicate screws or cracking plastic housing clips.
Related Posts
- Directives for Safe Home Air Conditioner Installation
- Decoding Complete Product Specifications and Technical Details for Smart Buyers
- Where to Find Dishwasher User Manual Instructions by Model: A Complete Guide
- The Ultimate Complete User Manual for Product Setup and Operation
- Refrigerator Installation Requirements for Proper Ventilation: Complete Guide
- Precision Screwdriver Set: Includes various Phillips, flathead, Torx, and Pentalobe bits designed for modern consumer electronics enclosures.
- Spudgers and Opening Picks: Non-conductive plastic pry tools used to separate snap-fit casings without scratching exterior finishes.
- Multimeter: An essential diagnostic instrument for measuring voltage, current, and electrical resistance to locate dead circuits.
- Soldering Iron and Desoldering Pump: Necessary for replacing faulty ports, broken switches, and degraded circuit board components.
- Isopropyl Alcohol (99%): High-purity solvent used to clean corrosion, remove old thermal paste, and prep circuit boards for soldering.
- Magnifying Glass or Digital Microscope: Provides clear visibility of microscopic solder joints and hairline fractures on microchips.
Troubleshooting and Repairing Common Power Issues
Power failures represent one of the most frequent technical complaints in household electronics. When a device refuses to turn on, the diagnostic workflow should begin at the power source and move inward. External power bricks often fail due to internal wire fraying or blown fuses inside the molded plug. Using a multimeter to test the DC output voltage of a power adapter instantly confirms whether the issue lies within the wall charger or the device itself.
If the power supply delivers the correct voltage, the problem likely resides on the internal power board. Common culprits include swollen electrolytic capacitors, which are visually identifiable by bulging tops or leaking electrolytic fluid. Desoldering these damaged components and soldering exact replacement capacitors restores steady electrical current to the motherboard. Power switches and DC input jacks also endure physical stress from daily plugging and unplugging, frequently developing cracked solder joints that require reflowing with a soldering iron.
Screen and Display Restoration Techniques
Cracked screens and flickering displays render many home electronic devices unusable, yet screen replacements are frequently achievable at home. Smartphones, tablets, and laptop displays are typically secured using a combination of strong adhesive strips and mechanical clips. Applying controlled heat via a heat gun or specialized heating pad softens the adhesive boundaries surrounding the glass panel.
Once the adhesive loses its structural grip, suction cups and thin plastic cards gently lift the damaged screen away from the metal or plastic chassis. Technicians must disconnect the display flex cables with extreme care to avoid tearing the delicate circuitry attached to the motherboard. Installing a replacement display panel involves reversing the disassembly steps, ensuring all ribbon cables click securely into their ZIF (Zero Insertion Force) connectors before resealing the device frame.
Audio Component and Speaker Diagnostics
Audio distortion, static interference, and complete sound loss are widespread issues in portable speakers, headphones, and television soundbars. Diagnosing audio faults involves isolating the signal path from the audio source to the speaker cone. Debris accumulation inside headphone jacks and charging ports often prevents proper electrical contact, which can be cleared safely using wooden toothpicks and high-purity isopropyl alcohol.
Inside acoustic enclosures, speaker wires may detach from terminal connections due to persistent vibrations. Re-securing these connections requires basic soldering skills. If a speaker driver produces a rattling noise, the issue is typically a torn paper or polymer cone. Applying a microscopic dot of flexible rubber cement to small tears can restore membrane integrity and eliminate distortion without requiring a full driver replacement.
Comparative Analysis of Electronic Repair Methods
| Repair Category | Difficulty Level | Required Tools | Cost Efficiency | Common Risks |
|---|---|---|---|---|
| Battery Replacement | Beginner | Screwdrivers, Spudger | High | Puncture hazards, thermal runaway |
| Screen Restoration | Intermediate | Heat Gun, Suction Cups | Medium | Shattered glass, flex cable damage |
| Solder Joint Reflow | Advanced | Soldering Iron, Flux | High | Heat damage to adjacent microchips |
| Port Cleaning | Beginner | Isopropyl Alcohol, Tweezers | Very High | Liquid ingress into device interiors |
Thermal Management and Overheating Solutions
Electronic devices generate substantial heat during operation, and inadequate thermal management leads to unexpected shutdowns, performance throttling, and permanent hardware degradation. Desktop computers, gaming consoles, and laptops rely heavily on cooling fans and heat sinks to dissipate thermal energy. Over time, dust accumulation blocks cooling fins, restricting airflow and causing internal temperatures to spike.
Routine maintenance involves opening the device enclosure and clearing dust blockages using compressed air canisters while holding fan blades stationary to prevent over-spinning damage. Furthermore, the thermal paste applied between the processor die and the metal heat sink degrades over time, hardening into a chalky layer that fails to transfer heat efficiently. Removing the old paste with isopropyl alcohol and applying a fresh pea-sized drop of high-performance thermal compound significantly lowers operating temperatures and extends the functional lifespan of the hardware.
Frequently Asked Questions
Are electronic repairs safe for beginners to attempt?
Basic maintenance tasks such as battery swaps, port cleaning, and RAM upgrades are generally safe for beginners if proper safety precautions are followed. Complex tasks involving high-voltage components, micro-soldering, or fragile glass removal require intermediate or advanced skill sets.
How do I prevent electrostatic discharge (ESD) from damaging electronics?
Using an antistatic wrist strap connected to a grounded metal surface neutralizes static electricity. Additionally, working on an antistatic mat and avoiding carpeted flooring minimizes ESD risks during disassembly.
Can swollen batteries be repaired?
Swollen lithium-ion batteries cannot be repaired and must be replaced immediately. Puncturing a swollen battery creates severe fire and chemical burn hazards. Old batteries must be disposed of at certified electronic recycling facilities.
What tools are mandatory for basic home gadget repairs?
A precision screwdriver kit, a non-conductive plastic spudger, a multimeter, and a bottle of high-purity isopropyl alcohol form the foundation of an effective home repair toolkit.
How do I find the correct replacement parts for my specific device?
Locating the exact model number, usually printed on a sticker underneath the device or within the software settings, allows technicians to source compatible replacement components from reputable electronics parts distributors.
Conclusion
Mastering DIY repair instructions for home electronic devices empowers consumers to take control of their technology, reduce household expenditures, and minimize environmental impact. By adhering to structured safety protocols, utilizing specialized tools, and systematically diagnosing hardware faults, individuals can successfully restore malfunctioning gadgets to peak operational performance. Whether replacing a degraded battery, reflowing a cracked solder joint, or cleaning blocked cooling fans, methodical patience yields reliable results. Embracing a restoration mindset ensures that household electronics continue to serve efficiently for years, transforming technological challenges into opportunities for practical skill development.
Featured Image Credit: Generated/Sourced via Unsplash.
Disclaimer: This article is AI-generated for informational and educational purposes. While we strive to provide high-quality context and authority, the content should not be used as professional advice. The author/website assumes no liability for external links or factual omissions.